Photographing Table Mountain from Woodbridge Island: Exact Viewpoints, Tide Timing and Settings
Pinpoint the two classic Woodbridge Island shots—Milnerton Lighthouse and the heritage wooden bridge—with exact stand spots, tide timing, sun angles by month, and long‑exposure settings for glassy reflections.
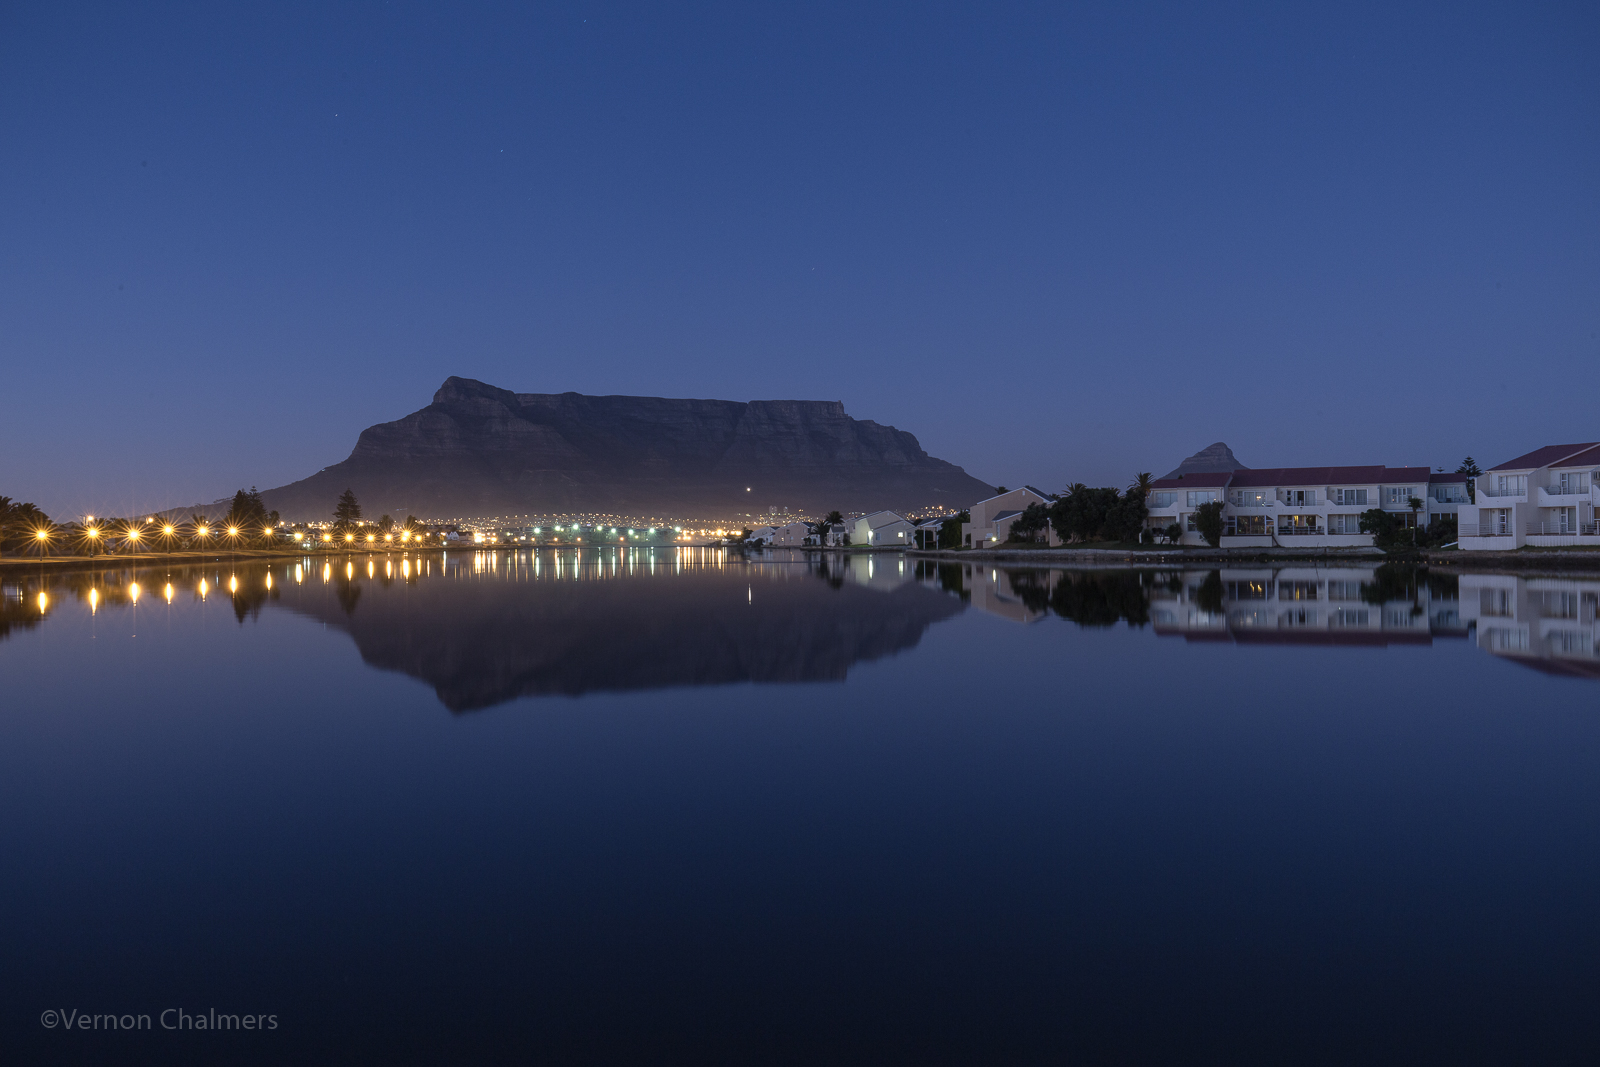
Woodbridge Island might be Cape Town’s most forgiving place to bring home a postcard‑worthy Table Mountain photograph. It’s flat, close to town, and offers two legendary compositions—the Milnerton Lighthouse on the beach and the old wooden bridge over the lagoon—with the mountain filling the backdrop. This guide pinpoints precisely where to stand, when the light lines up month by month, and how to time the tide and dial in your long exposures for mirror‑calm reflections.
Why Woodbridge Island is perfect for Table Mountain shots
- Quick access: About 15 minutes’ drive from the CBD, with secure, patrolled residential areas and public beach access on the seaward side.
- Two distinct scenes within a short walk: Atlantic beach with the Milnerton Lighthouse, and the sheltered lagoon crossed by the historic wooden bridge.
- Predictable wind and tide patterns: Calm early mornings are common, and slack tides create still water for reflections.
- North‑facing view: From here you’re looking toward the mountain’s iconic north face, which glows beautifully at golden hour.
Tip: Summer afternoons can be windy; mornings are typically calmer with cleaner air. In winter, fronts blow through, then skies clear dramatically with low, warm light.
Classic Shot 1: Milnerton Lighthouse + Table Mountain
The cleanest, most printable frame puts the white lighthouse as a vertical anchor with the mountain stacked behind it.
Exact standpoints
- Simple beach portrait (safe, all tides): Park at the public beach near the lighthouse and walk onto the sand. Compose at 35–70 mm with the lighthouse on a third and Table Mountain centred. The golf course dunes will be behind you; keep the sea to your right if you’re facing the mountain.
- Reflection in tidal pools (best at low to mid‑tide): On spring low tides (around new/full moon), shallow pools form on the flat beach just north of the lighthouse. Crouch low (knee‑height tripod) 20–40 m from the waterline to double the lighthouse and mountain in the mirror surface.
- Surf‑line drama (mid‑tide with small swell): Step back from the shore break and time the retreating wash to leave wet‑sand sheen. A 0.3–1 s exposure paints silky streaks leading toward the mountain.
When to shoot it
- Sunrise year‑round for calm air; sunsets from October to April for warm side‑light, but watch for afternoon winds in midsummer.
- Ten to twenty minutes after sunset (blue hour) when city lights flicker across Table Bay—great for long exposures and smooth water.
Recommended settings (starting points)
- Golden hour: ISO 100, f/11–f/16, 1/10–1/60 s. Use exposure compensation (+0.3 to +0.7 EV) if the sand/sky tricks your meter.
- Long exposure for silky sea: Add a 3–6 stop ND to reach 0.3–2 s in brighter light; step to 6–10 stop ND for 10–60 s after sunset.
- Starburst sun peeking past the lighthouse: f/16, spot meter for the highlights, bracket ±1–2 EV.
Classic Shot 2: The Old Wooden Bridge Reflection
The restored timber bridge (a protected heritage landmark) arcs across the lagoon just inland from the beach. When the water is still, it’s a perfect mirror with Table Mountain seated beyond.
Exact standpoints
- Island‑side bank (diagonal lead‑in): From the island’s promenade beside the lagoon, face southeast toward the bridge so it cuts across your frame. Place the bridge’s near end in the lower‑left third; Table Mountain fills the upper centre.
- Mainland/Milnerton bank (symmetry): From opposite the island, position yourself to see the bridge side‑on for a bow‑shape reflection. Use a 24–35 mm lens to keep the whole arc without distortion.
- Under‑bridge patterns: Stand a few metres from the abutment and aim along the timber rails for converging lines toward the mountain. Best at higher tide when the muddy edges are covered.
When to shoot it
- Early morning is king—winds are lighter and the lagoon surface is often glassy.
- Aim for slack high tide (±30–45 minutes around high) to minimise current ripples and hide mudflats. Slack low tide can also be calm, but you’ll expose more banks unless you shoot tight.
Recommended settings (starting points)
- Still reflections: ISO 100, f/11, 1/8–1/60 s. Focus about one‑third into the scene or use hyperfocal for edge‑to‑edge sharpness.
- Perfect‑mirror long exposure: With subtle ripples, add a 6–10 stop ND to reach 10–60 s. Any movement disappears, and clouds streak gently across the mountain.
- Polariser: Use lightly (quarter‑turn) to tame glare but avoid over‑polarising wide skies, which can band unevenly.
Sun direction by month (Cape Town, quick planner)
Understanding where the sun rises and sets helps you choose which composition will sing on your visit. Angles below are approximate azimuths on the horizon.
- December–January
- Sunrise: ESE (about 115–125°) — soft left‑hand light for the bridge.
- Sunset: WSW (about 235–245°) — warm cross‑light on lighthouse and mountain; strongest color but expect afternoon wind.
- February–March
- Sunrise: 100–115° — still great for the bridge.
- Sunset: 245–265° — sun drifts more westerly; balanced side‑light for both scenes.
- April
- Sunrise: ~90–100° (due‑eastish).
- Sunset: ~265–275° — often very clean air and pastel afterglow.
- May–July
- Sunrise: ENE (about 65–85°) — low, golden rakes across the bridge.
- Sunset: WNW (about 285–300°) — the sun sets farther right; rim‑light and moody skies after winter fronts.
- August–September
- Sunrise: 80–95° — crisp, cool light; longer dawn.
- Sunset: 270–285° — great balance for lighthouse and bridge alike.
- October–November
- Sunrise: 95–110° — spring bloom and soft mist.
- Sunset: 255–270° — warmer evenings as the wind season begins.
Use any sun‑position app to confirm the exact azimuth for your date; plan so the sun grazes the mountain’s face rather than blasting head‑on.
Tides, swell and wind: timing for mirror water
- Lagoon reflections (wooden bridge): Target slack high tide for the cleanest mirror. Check Table Bay/Milnerton lagoon tide tables and arrive 45 minutes early to scout. If the breeze ripples the surface, drop a 6–10 stop ND and run 10–30 s exposures to average the texture away.
- Beach reflections (lighthouse): Spring low tides carve shallow pools that hold still long after waves recede. After sunset, retreating water leaves polished wet sand that mirrors the skyline for 5–10 minutes.
- Wind strategy: Summer’s south‑easter often builds from late morning; sunrise is your calm window. In the cooler months, shoot right after a cold front moves through—crystal skies, dramatic clouds, and golden, low‑angle light.
Field‑tested recipes you can copy
- Summer sunrise, wooden bridge mirror
- 16–35 mm at ~20 mm, ISO 100, f/11, 1/6–1/2 s; with a 3–6 stop ND if it’s already bright. Focus a third into the frame, 2‑second timer, tripod.
- Winter sunset, lighthouse + surf streaks
- 24–70 mm at ~35–50 mm, ISO 100–200, f/13, 0.5–1.5 s with a 3–6 stop ND. Time exposures as waves retreat to paint leading lines.
- Blue‑hour city glow across the bay
- 35–70 mm, ISO 100, f/11, 10–30 s (no ND). Long exposure noise reduction on; use a remote or 2‑second timer.
- Sun‑star peeking past the lighthouse
- 24–35 mm, ISO 100, f/16, 1/60–1/200 s near sunset. Shade the lens with your hand to kill flare; bracket for dynamic range.
Gear and technique checklist
- Tripod with a stable stance (sand spikes or spread the legs wide on the beach).
- 3–6 stop ND for silky water in golden hour; 10 stop for cloud streaks after sunset.
- Circular polariser (light use). Microfibre cloths for sea spray.
- Spare battery (long exposures + image stabilisation off will sip less power, but blue hour is hungry).
- Manual focus on magnified live view for tack‑sharp bridge timber or lighthouse edge. Turn off IBIS/IS on a tripod.
- Shoot RAW and bracket ±1–2 EV if the sky is hot; blend later for a natural dynamic range.
Access, etiquette and safety
- Park at the public beach near the lighthouse or along the lagoon promenades. Walkways are open to the public; respect residents’ privacy.
- Stay on paths and keep off the sensitive dune vegetation.
- Carry minimal kit, keep bags closed, and consider a buddy for pre‑dawn or late blue‑hour sessions like you would in any big city.
- No drones without checking local airspace rules and the national aviation authority’s regulations; parts of Table Bay fall under controlled airspace.
Stay steps from the shot
Base yourself in Milnerton so sunrise at the bridge or lighthouse is an easy stroll or a two‑minute drive. PrimePlaces offers comfortable, self‑catering stays right on this coastline:
- Large Apartment Stunning Ocean Views. — wide‑open Atlantic and mountain vistas from your lounge.
- Amazing Ocean Views from Every Room. — watch dawn light kiss Table Mountain before you head out.
- Postcard Views of Table Mountain. Generator for elevator. — a practical, serviced apartment with exactly the panorama you came to capture.
One last plan‑then‑shoot timeline
- T‑24 hours: Check wind forecast (aim for gentle mornings), tide table (target slack high for the bridge, low for beach pools), and sunrise/sunset azimuth in a sun‑path app.
- T‑60 minutes: Arrive, walk both compositions, pick foregrounds, and pre‑set focus and filters.
- Golden hour: Work your primary shot, then pivot quickly for the afterglow. Don’t leave when the sun drops—blue hour is often the keeper.
Dial in the tide and the light, and Woodbridge Island will reward you with the two definitive Table Mountain frames—one maritime, one tranquil—both unmistakably Cape Town.